This post contains affiliate links to products. We may receive a commission for purchases made through these links.
I have always been looking for a simple expense manager app I could use with my wife to collect our daily expenses. This app should be a voice app that parses my voice and adds a line to a spreadsheet or something. Since I could never find something like that, I’ve decided to build such an app of my own.
The application
I and my wife needed an application with these features:
- The input must be voice audio, like “30.4 bread and butter”
- A row must be added to a Google Sheets file
These requirements come from the haste of every day, which prevents us to type text into an application. Moreover, we needed a shared tool that could write to the same Google Sheets, to which we would attach a Google Data Studio dashboard later.
I have been looking for such an application on the Android app store for weeks, but I didn’t find anything free that could fit these requirements. So, I have decided to create such an application by myself.
The architecture
This application is similar to the voice diary I have been talking about some weeks ago, but I have decided not to use Heroku and Python and replace them with Make.com. Make (formerly known as Integromat) is a no-code platform to mix services together. I always say that Make.com is what Zapier should be and never will be because it allows you to create complex applications with almost no effort and without writing a single line of code. I have automated several things in my teacher job using Make and I’m really satisfied. That’s why I’m going to use it.
The voice input starts from a Telegram bot and the transcription is performed by AssemblyAI, as my voice diary. AssemblyAI is a platform that allows doing several things with audio files, including voice transcription in several languages. I’ve used it for a few months and I can tell it’s very useful and easy to implement. The most astounding feature is its ability to add punctuation to the transcribed sentences and it’s very accurate. I think it’s one of the most useful tools for voice transcription and audio parsing out there.
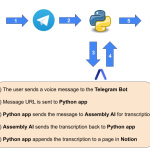
The complete architecture is, then:
- The user sends a voice message to a Telegram bot in the format “<amount> <description>”
- A Make scenario gets the voice message and sends it to AssemblyAI for transcription
- A Make webhook receives the transcription, parses the text to extract the amount of the transaction and the description and adds them as a new row of a Google Sheets file
The third point is a fast way to get the transcription result from AssemblyAI. According to their API reference, you can get the transcription by polling an endpoint or by receiving a message using a webhook. So, the Make scenarios are 2: one gets the voice message and another one gets the transcription.
Let’s now configure all the necessary tools.
Telegram bot configuration
First of all, we have to create a new Telegram bot. We first need to open a chat with @botfather user and send the “/newbot” command. Let’s give the bot a friendly name and a username and save the API key returned after this message.
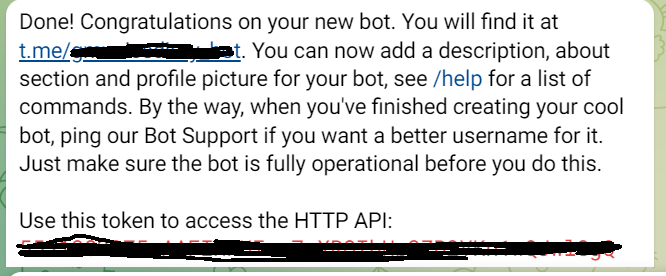
We’ll need this key later on Make.com.
Get AssemblyAI API key
Create a free account on assemblyai.com. Then login and you’ll see the API key under the “Developers” menu.
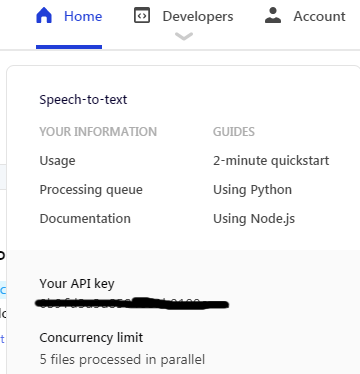
Save this API key somewhere, because it will be useful later.
Scenario #1: the Telegram Bot
Now comes the fun part. First, let’s open Make.com and create a new scenario. I’ve called it “GM Expense Manager Telegram Bot”, but you can call it however you want.
Let’s add a new Webhook and copy its URL.
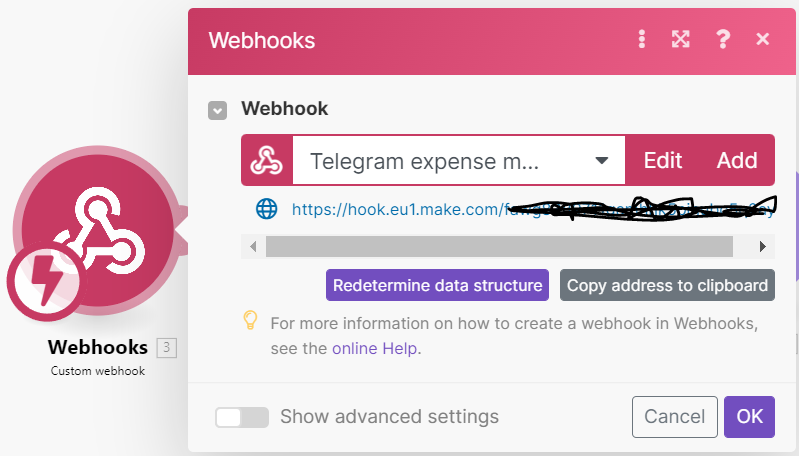
Make determines the structure of the Webhook by the first call, so we have to add it to Telegram. Open a browser and type:
https://api.telegram.org/bot<bot_token>/setWebhook?url=<webhook_url>where <bot_token> is the Telegram bot token and <webhook_url> is Make webhook URL.
Open a chat with your bot and click on “/start”. Unfortunately, this is not enough because the text message doesn’t contain all the necessary information required to process a voice message, so you have to click again on the Webhook node and click on “Redetermine data structure”. Then go to Telegram and send a voice message to the bot. This will help Make webhook recognize the JSON structure of the message sent by Telegram.
Now we have to retrieve the URL of our voice message file. This URL will be sent to AssemblyAI for transcription.
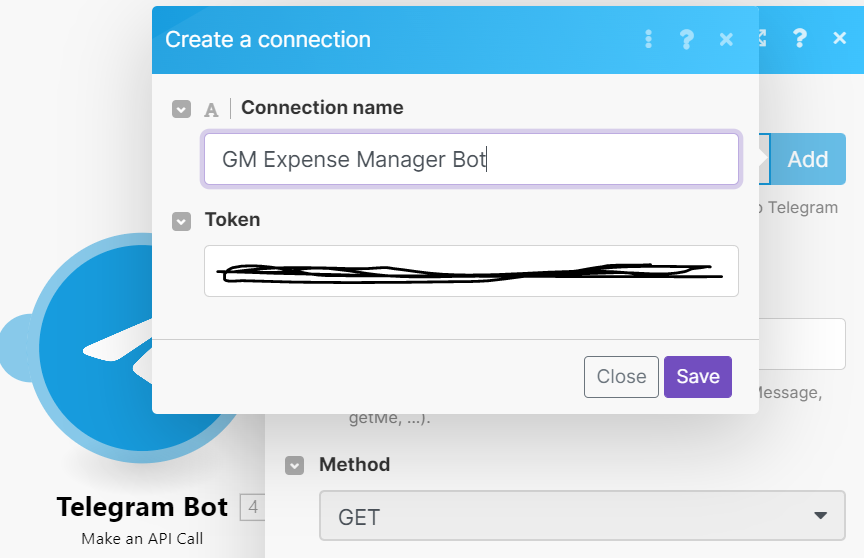
Let’s add a “Telegram Bot: Make an API call” node to the scenario and click on add. Let’s type a name for the connection to the bot and add the Telegram bot API key given by Botfather.
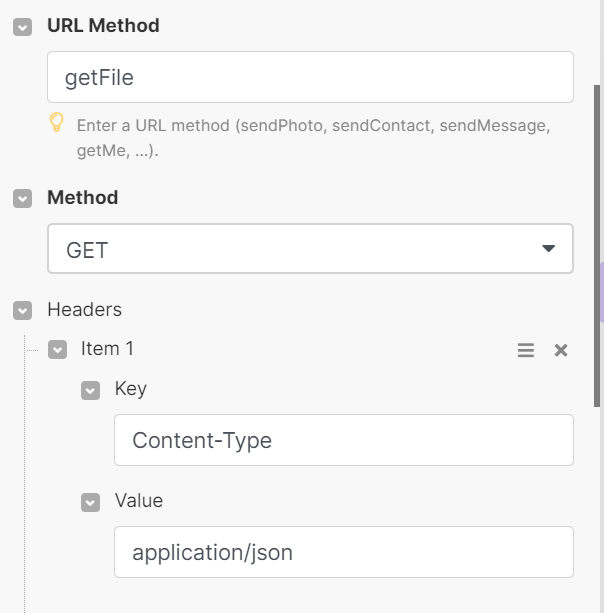
Once the bot has been added, set the headers and the URL method this way:
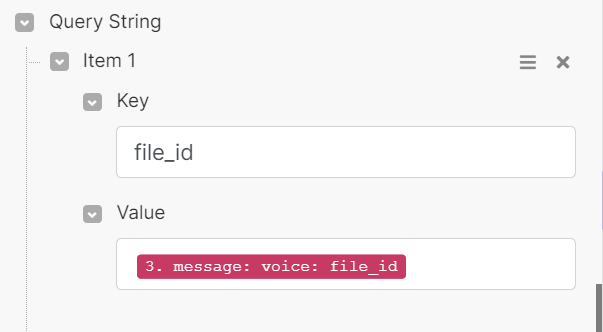
On the same window, make sure that the query string looks like this:
Click on “Run Once” to start the scenario and send another voice message from Telegram. At the end of this operation, the Telegram Bot node will be configured.
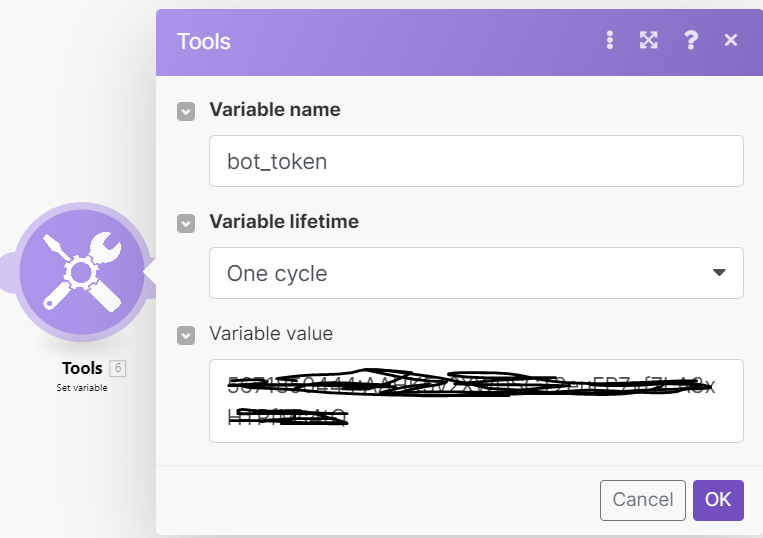
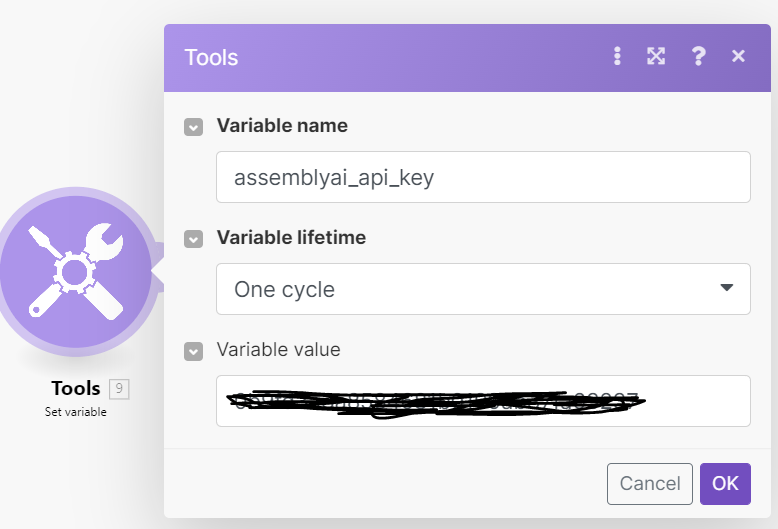
Let’s now add a “Set Variable” node to store the bot token and another node of this type to store the AssemblyAI token.
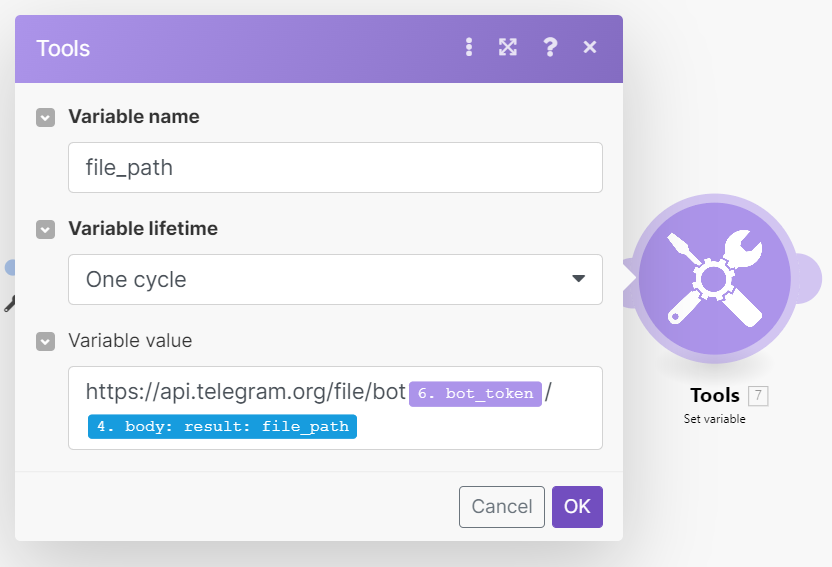
Finally, let’s build the URL of the voice message.
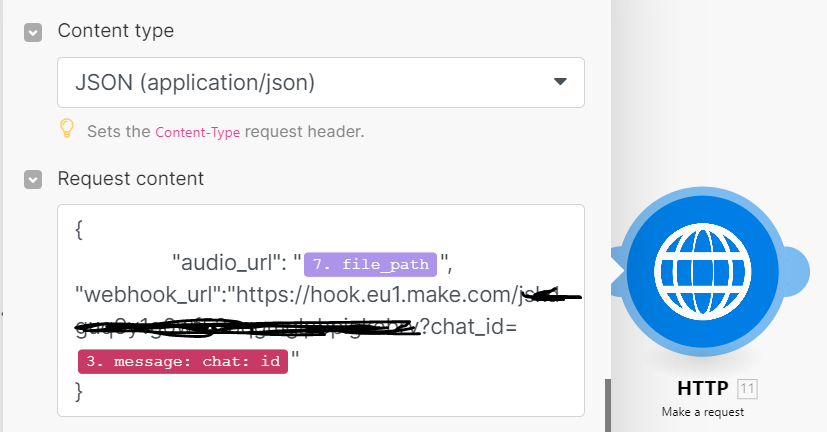
In the end, we need to call AssemblyAI API with the URL of the voice message to be transcribed. Before doing this, we have to create a new Webhook that will be invoked by AssemblyAI. So, we have to create a new scenario with a new webhook. Let’s write the Webhook URL down and add a final HTTP node to this scenario:
The body of the request contains the audio URL and the URL of the new webhook. We add a “chat_id” parameter in order to make the second scenario reply to the user.
The complete workflow should be similar to this:

Scenario #2: the response Webhook
In the previous scenario, we used the URL of a Webhook created in the second scenario. This webhook is called as soon as the transcription of the audio is ready. We’ve added the chat_id parameter to the GET parameters in order to make the bot reply to us and receive a notification of the resulting transcription.
Now, we have to get the transcribed text and add a row to Google Sheets.
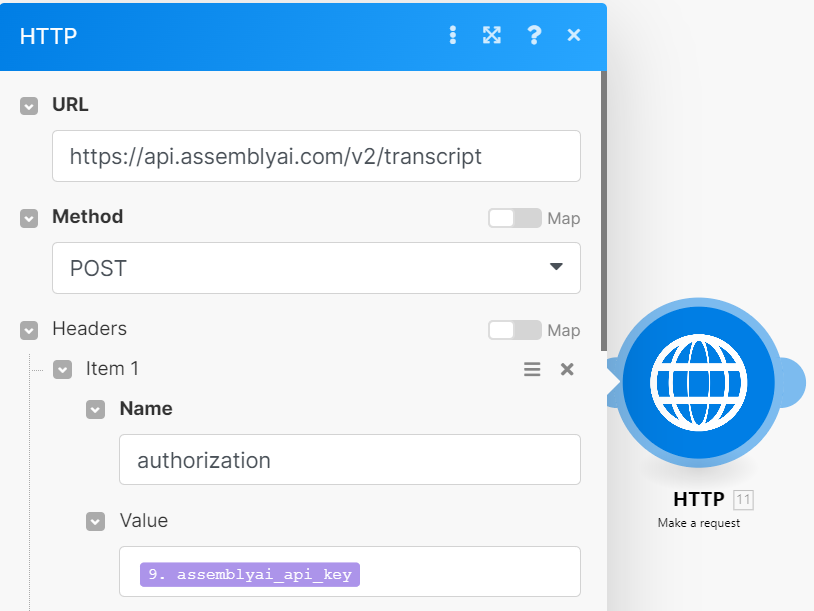
In order to get the text, we need to call another endpoint of AssemblyAI with the transcription_id received through Webhook. So, we add an HTTP module and add the API key as an authorization header. Don’t forget to set “Parse response” to Yes in order to correctly parse the resulting JSON.

Now we can split the amount and the description of the transaction text from the resulting text. We create 2 variables using a “Set multiple variables” node. The first word is the amount, and the other part of the text is the description. We can easily perform such a split using the location of the space that separates the first word from the next part of the text.

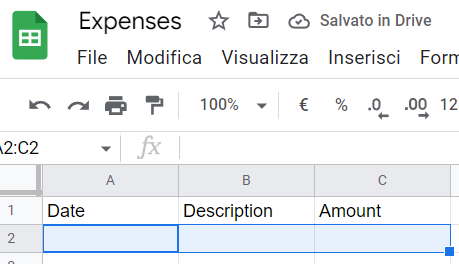
Now we can create a Google Sheets called, for example, “Expenses” and create the columns.
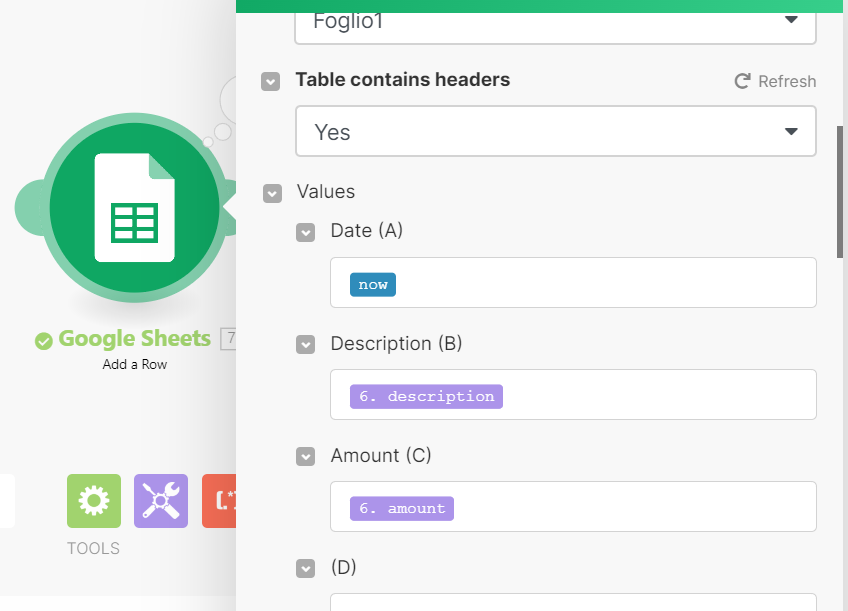
After we connect Make with Google Sheets, we can add a node to add a row to it and fill in the values.
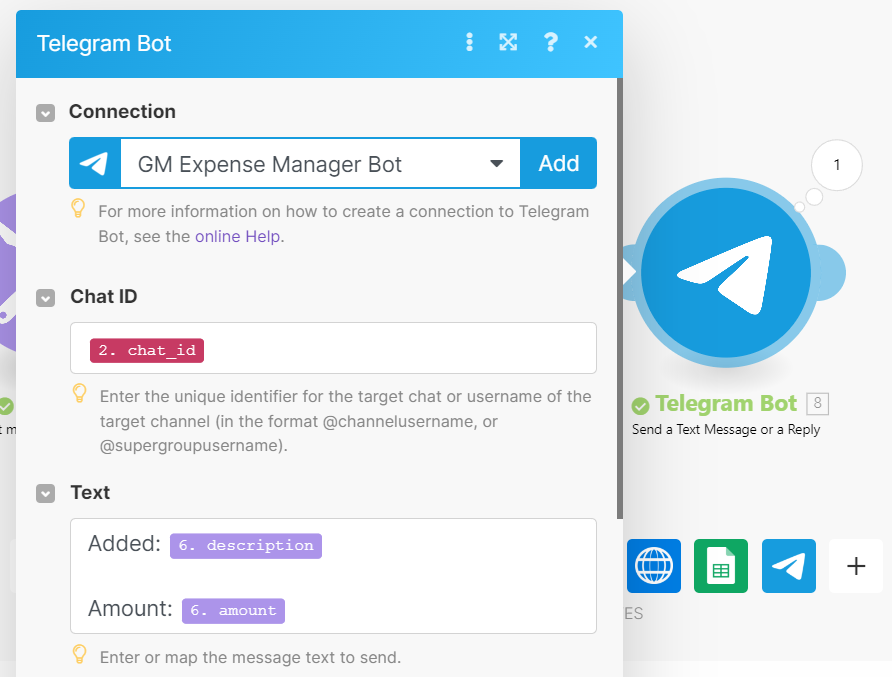
Finally, let’s get back to Telegram and send a confirmation text.
This is what our final scenario should look like:
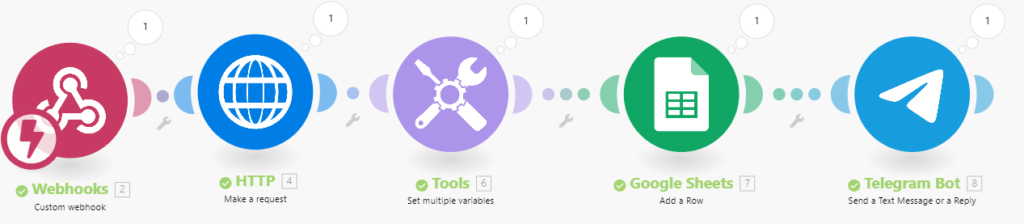
Let’s save all the scenarios and activate them. Now we have finished! Let’s try our new tool!
Let’s try it!
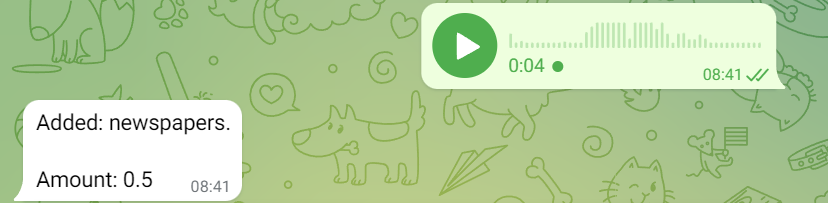
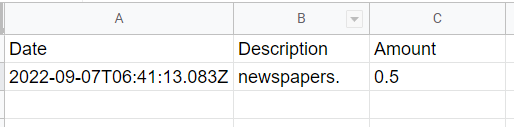
We can now send a vocal message to our Telegram Bot like, for example: “0.5 newspapers”. After a few seconds, we get a confirmation message.
And the row has been correctly added to our Google Sheet.
Possible refinements
As we can see, this bot is pretty simple to use. Some possible refinements include a stronger API key handling using Make and a filter that makes the entire workflow work only if the messages are sent by certain users. With the necessary refinements, we can create our personal voice expense manager with almost no effort.
Conclusions
This is a simple example of how to use AssemblyAI to create a voice expense manager. The process has been created with the Make.com no-code platform, but we could have implemented it even using custom code in PHP, Node.js or Python. The capabilities of AssemblyAI and its flexibility allow any user to benefit from its features even without writing a single line of code.